
Tech Tips & Information
Rotax Max Power Valve Prep
|
Tech Tips & Information |
Rotax Max Power Valve Prep
The Rotax Max FR125 is fitted with a power valve (PV) to give more power, at low revs, by physically lowering the exhaust port height below 7,500rpm. The spring loaded valve opens fully as exhaust gas pressure rises and overcomes the spring. The position of the power valve, within the exhaust port, means it is subject to lots of oil. The oil must be cleaned off regularly to aid smooth operation and accurate opening of the power valve. This article is written to assist Max mechanics to strip, examine and rebuild the all important power valve. If in doubt take digital photos of your power valve assembly before and during disassembly.
 |
 |
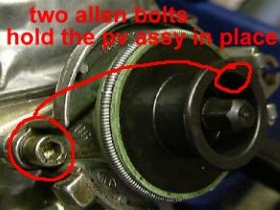 |
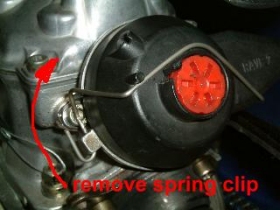
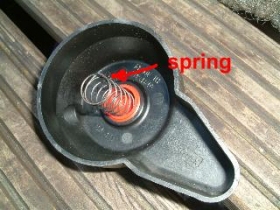
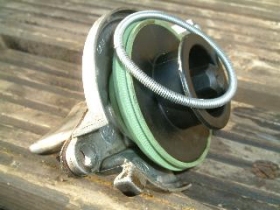
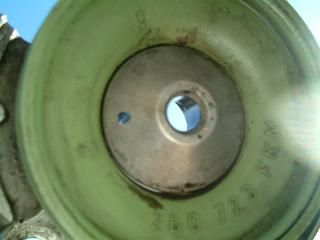
| The picture above shows complete PV assembly mounted to engine. The PV cover is held in place by a spring steel clip. | This picture shows PC cover removed and compression spring exposed. | Here we see the PV assembly without cover. The green bellows are held in place with the spiral spring. |
|
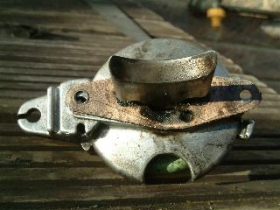
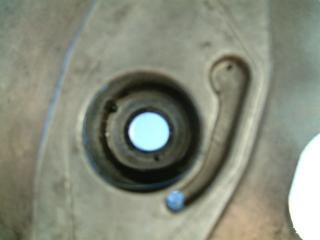
Here we see a power valve assembly removed from the engine. |
 |
| Important points to be noted:
|
|
Important points to be noted:
|
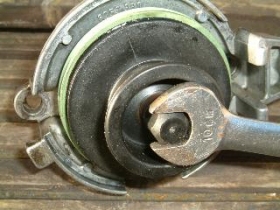 |
The power valve blade (exhaust valve)
can be separated from the assembly by rolling the bellows off the central
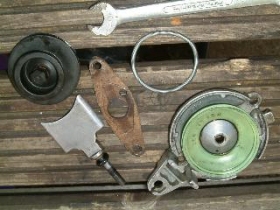
resin assembly (exhaust valve piston) and then undoing the central PV bolt with a 10mm spanner. The various parts of the PV assembly |
 |
 |
 |
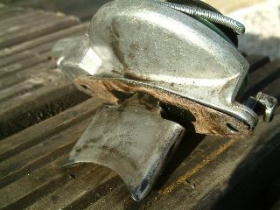
| Clean the
bellows casing until the vent hole is clear, as shown in the picture above where the blue sky shows! |
Clean the
casing until all oil is removed and the vent port and vent hole are clear. |
The video below shows the PV assembly attached to the engine by the two allen screws. The smooth operation of the PV assembly is essential. If the bellows do not return the PV, after depressing it and releasing, try slackening the allen bolts and re-aligning the assembly in the PV port. The blade may be catching the port and 'hanging up'.
Note: there is further upward movement of the PV assembly/bellows unit (shown at the two thirds distance of the video) but this does not affect performance and serves only to create clearance for the PV assembly at the end of each stroke.
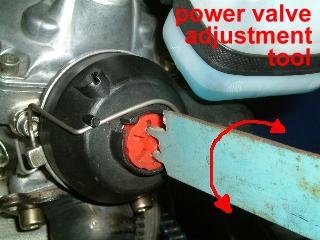
All that is left is the fitting of the PV cover, fitting of the cover spring clip, and the setting of the PV. The adjustment of the power valve timing is set by running the engine, preferably on track/under load, and noting the revs it 'comes in' at. It should 'come in' at 7,500rpm. If it comes in at a lower rpm then turn the red adjuster inwards (clockwise) to put more tension on the PV spring. Conversely, if the PV is staying closed too long we need to take some of the PV spring tension off the assembly. We do this by unscrewing the red adjuster (anticlockwise) a notch at a time until the PV comes in at 7,500rpm.
Make or buy a PV adjuster tool similar to the one below.
Look after the power valve and it will look after you!
This article was produced by Brian Pollard, author of "Preparing the Gx160 for 'open' racing" which is available on CDROM, in multimedia format, as an e-book, and in paper form. All enquires should be sent to the above e-mail address.
| News | Karts & Karting |
Notice Board |
Market Place |
Companies Directory |
Tracks Directory |
Events Calendar |
Race Results |
Photo Gallery |
Links |
Copyright © 1996-2018 UK Karting Comments, Suggestions etc. mail@karting.co.uk |